So, you want to start a blog with HostGator?
In the past, before the existence of website builders and content management systems, there were two ways only to build a blog or a website.
The first way was to code your entire website yourself if you know how to code. Otherways, you would have to learn to code first before building your website which will cost you time and money as well.
The second way was to hire a professional to build your website for you. Hiring a professional those days required a budget of course. Moreover, you had to wait until the developer finish your website before you could publish it.
Luckily, creating a blog is not rocket since anymore thanks to content management systems like WordPress, you can start your own blog without writing a single line of code. Additionally, you can get your blog published in a few minutes.
In this step-by-step guide, we will show you how you can easily start your WordPress blog on HostGator even if you have no idea what a blog is.
This guide explains how to buy hosting from HostGator as well as getting the exclusive discount HostGator offer to WP-ME.com readers.
After buying the hosting and the domain name which is included for free in the discount, we will show you how to install WordPress on HostGator the right way.
So, By the end of this guide, you will have a fully functional blog.
Why WordPress?
Currently, more than 35% of all websites are powered by WordPress. WordPress is also the most used CMS with a market share of 60% of the global CMS market.
There are many reasons why WordPress is the best Content Management System and why you should use it for your blog.
Top reasons to use WordPress
- WordPress is free and open-source.
- WordPress SEO friendly.
- WordPress is easy to use and manage.
- WordPress can be easily customized by WordPress themes and plugins.
- WordPress is secure.
- Unlike website builders, you have the freedom to choose where to host your WordPress site.
Why HostGator?
Although WordPress is free, you still need hosting and a domain for your blog. Choosing a good WordPress hosting provider for your blog or website can be tricky.
With such a huge number of web hosting providers out there, a lot of beginners make mistakes when choosing the hosting provider.
The problem is, you can not tell if a host is good or bad unless you buy their hosting service. At that point, you might find yourself stuck in a long contract with a poor hosting company.
So, you should be careful when you decide which provider to host your blog with.

One of the oldest and most popular hosting providers is HostGator.
This Houston-based web hosting provider was found by Brent Oxley in 2002.
HostGator was Later acquired by Endurance International Group (EIG) in 2012.
EIG is a large publicly traded (NASDAQ: EIGI) web hosting and technology company that owns 70+ brands including Bluehost, iPage, HostMonster, and many more.
HostGator offers shared web hosting, cloud hosting, Virtual Private Servers (VPS), managed WordPress hosting, Dedicated hosting as well as reseller hosting and domain name registration.
Starting a WordPress blog on HostGator is very easy, thanks to their QuickInstall tool that allows you to install 50+ scripts like WordPress, Joomla, Drupal, etc.. on your account with a few clicks.
HostGator pros include
- Unlimited disk space, bandwidth, email, and databases.
- Low hosting prices
- Free SSL certificate
- Free domain name
- Free website transfer
- cPanel control panel
- One-click WordPress install
- 24/7 customer support via phone & live chat
- 45-days money-back guarantee
Exclusive Offer for WP-ME.com Readers
Our readers get 61% OFF HostGator hosting + a FREE domain name with hosting.
Use this coupon code during checkout to get the maximum discount on HostGator hosting.
You can also start a WordPress blog on Bluehost which is very similar to HostGator and both are owned by EIG.
Ready to start your blog? Grap a cup of coffee or tea and follow the following steps…
How to Start a Blog with HostGator
As we mentioned above, HostGator made it easier than ever to start your own self-hosted WordPress blog.
Next, we will show you how you can buy web hosting and a domain name for your blog and how to set up a WordPress blog.
Luckily, our HostGator deal includes a free domain name with hosting at no additional cost to you.
How to Buy Hosting and Domain from HostGator
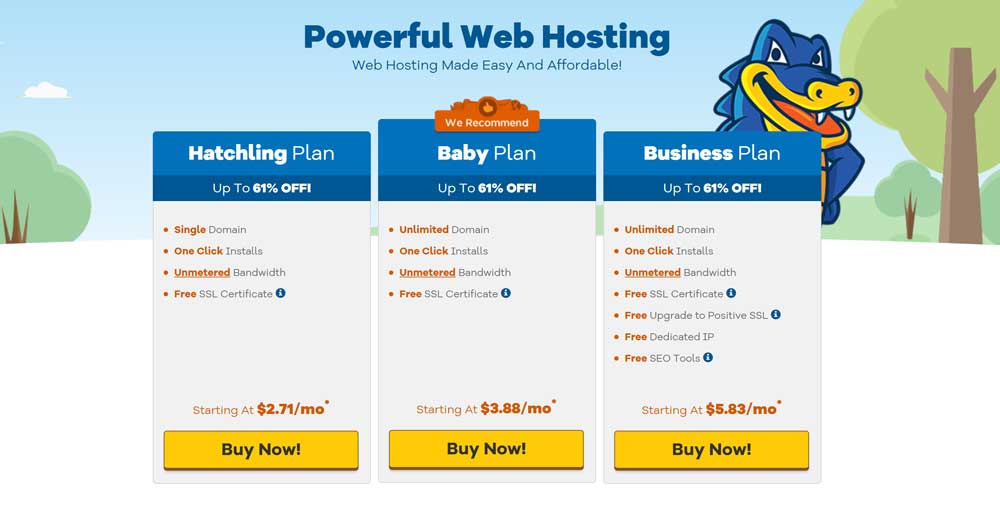
First, head over to our HostGator exclusive promo page.
Select the hosting plan you want and click on Buy Now!
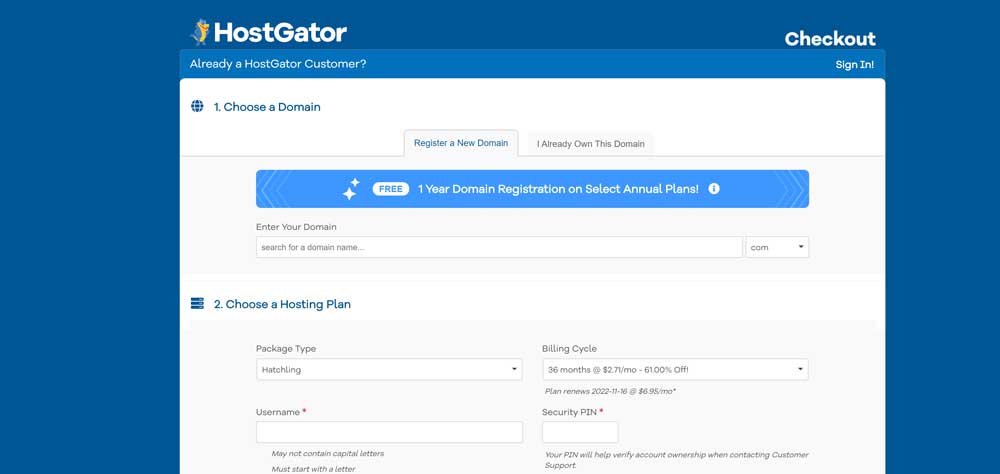
On the next screen, buy a new domain name that is included for free in our HostGator deal or enter an existing domain to use for your blog.
Then select the billing cycle, enter billing information, and complete the checkout process. HostGator’s checkout process is simple and straightforward.
Keep in mind that you will get a lower price if you choose a longer-term and people usually buy 36 months.
To get the best deal, make sure to use this coupon HOSTINGDEAN code during checkout.
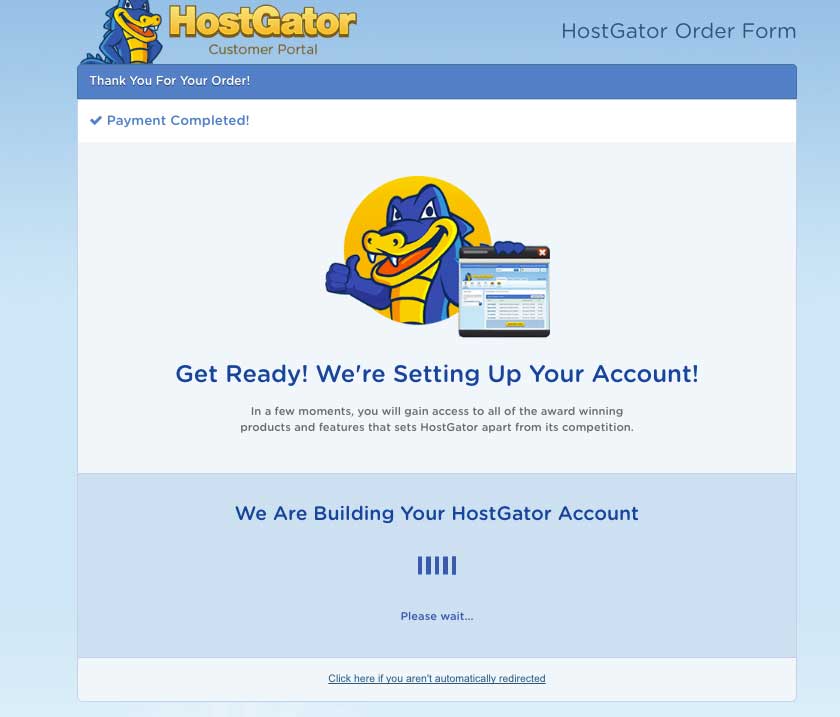
After completing the payment your account will be created and you will be redirected to your account’s control panel.
From there, we will continue to the next step and install a WordPress blog on your hosting account.
How to Install WordPress on HostGator
The last section of this guide is setting up your blog on your new hosting account. We will be using HostGator’s one-click installer tool to install WordPress.
The manual way of installing WordPress includes downloading and re-uploading WordPress to your hosting account, creating a database for the new blog, and setting up WordPress.
Fortunately, HostGator’s QuickInstall tool will handle all the dirty work and you will only have to enter some information and click some buttons.
HostGator uses a very popular hosting control panel called cPanel. cPanel is a software that makes it super easy to manage your web hosting environment.
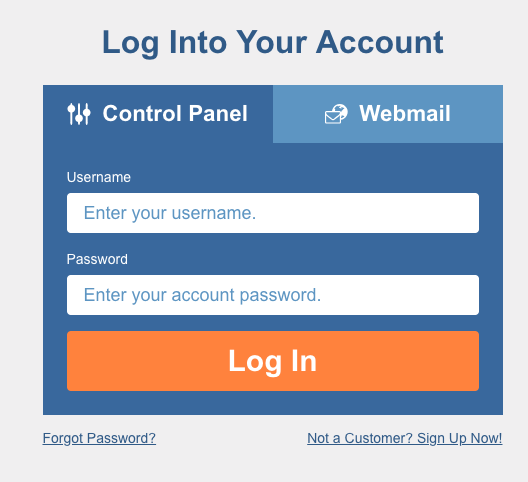
To install WordPress, you will first need to login to cPanel. The login link, username, and password should have been sent to your email after you finished purchasing the hosting.
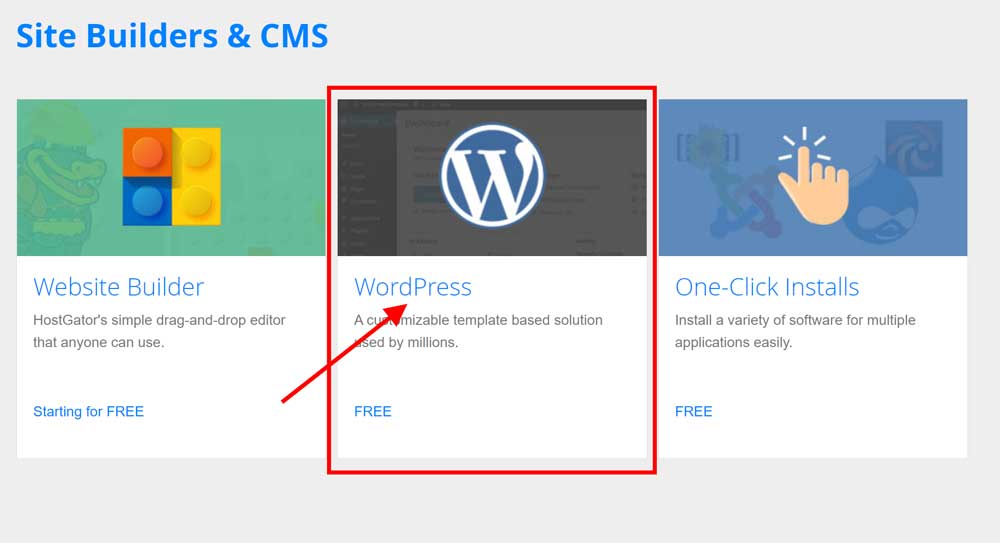
Once you log in, scroll down to the “Software” section and click on “QuickInstall”.

Now, click on WordPress
On the next screen, do as follows
- Select the domain name of the new blog.
- If you want to install WordPress in a subdirectory (e.g.
wp-me.com/blog/) enter it or leave it blank. - Then click NEXT to continue to the next step.

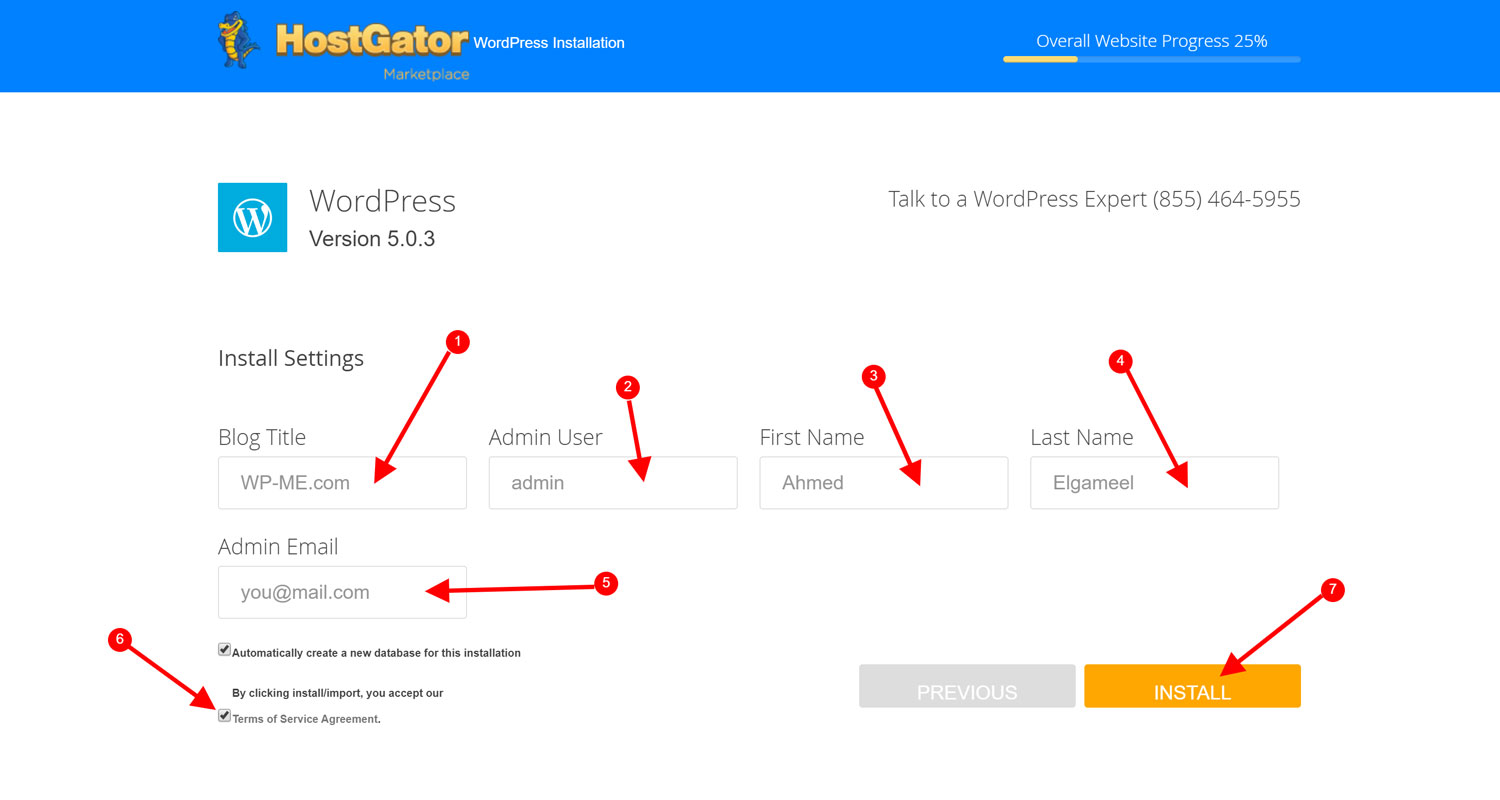
On the following screen, enter your blog info as follows
- Your blog title.
- Administrator’s account username (I don’t recommend using admin).
- Your first name.
- Your last name
- Admin account email.
- Check to accept Terms of Service.
- Finally, click on INSTALL.
After you click install, the tool will install your blog and you will see a message. The message will contain your blog’s admin area URL, username, and password, make sure to save them.
Congrats, you now have a fully functional WordPress blog on your HostGator hosting account. You can now write and publish your first blog post, install a WordPress plugin or a theme.
If you faced any problem or have any questions on how to start a WordPress blog on HostGator, feel free to drop us a line below.
Disclosure: This page may contain some affiliate links, which means we might get a commission if you decide to make a purchase through my links, at NO additional cost to you.
This is an excellent description of how to start a blog. Thorough, and complete. Nice job!
Need help, I have Page for my Business, Smile’ your Home, interested in moving it, I own the URL, need Hosting.
Hey Judy,
Follow the steps above and you will buy hosting from HostGator.